
Mixed Reality dashboard for creative professionals
I am excited about the potential of creative environments in Mixed Reality, such as Apple Vision Pro. In this article, I go through the process of creating this render using Blender.
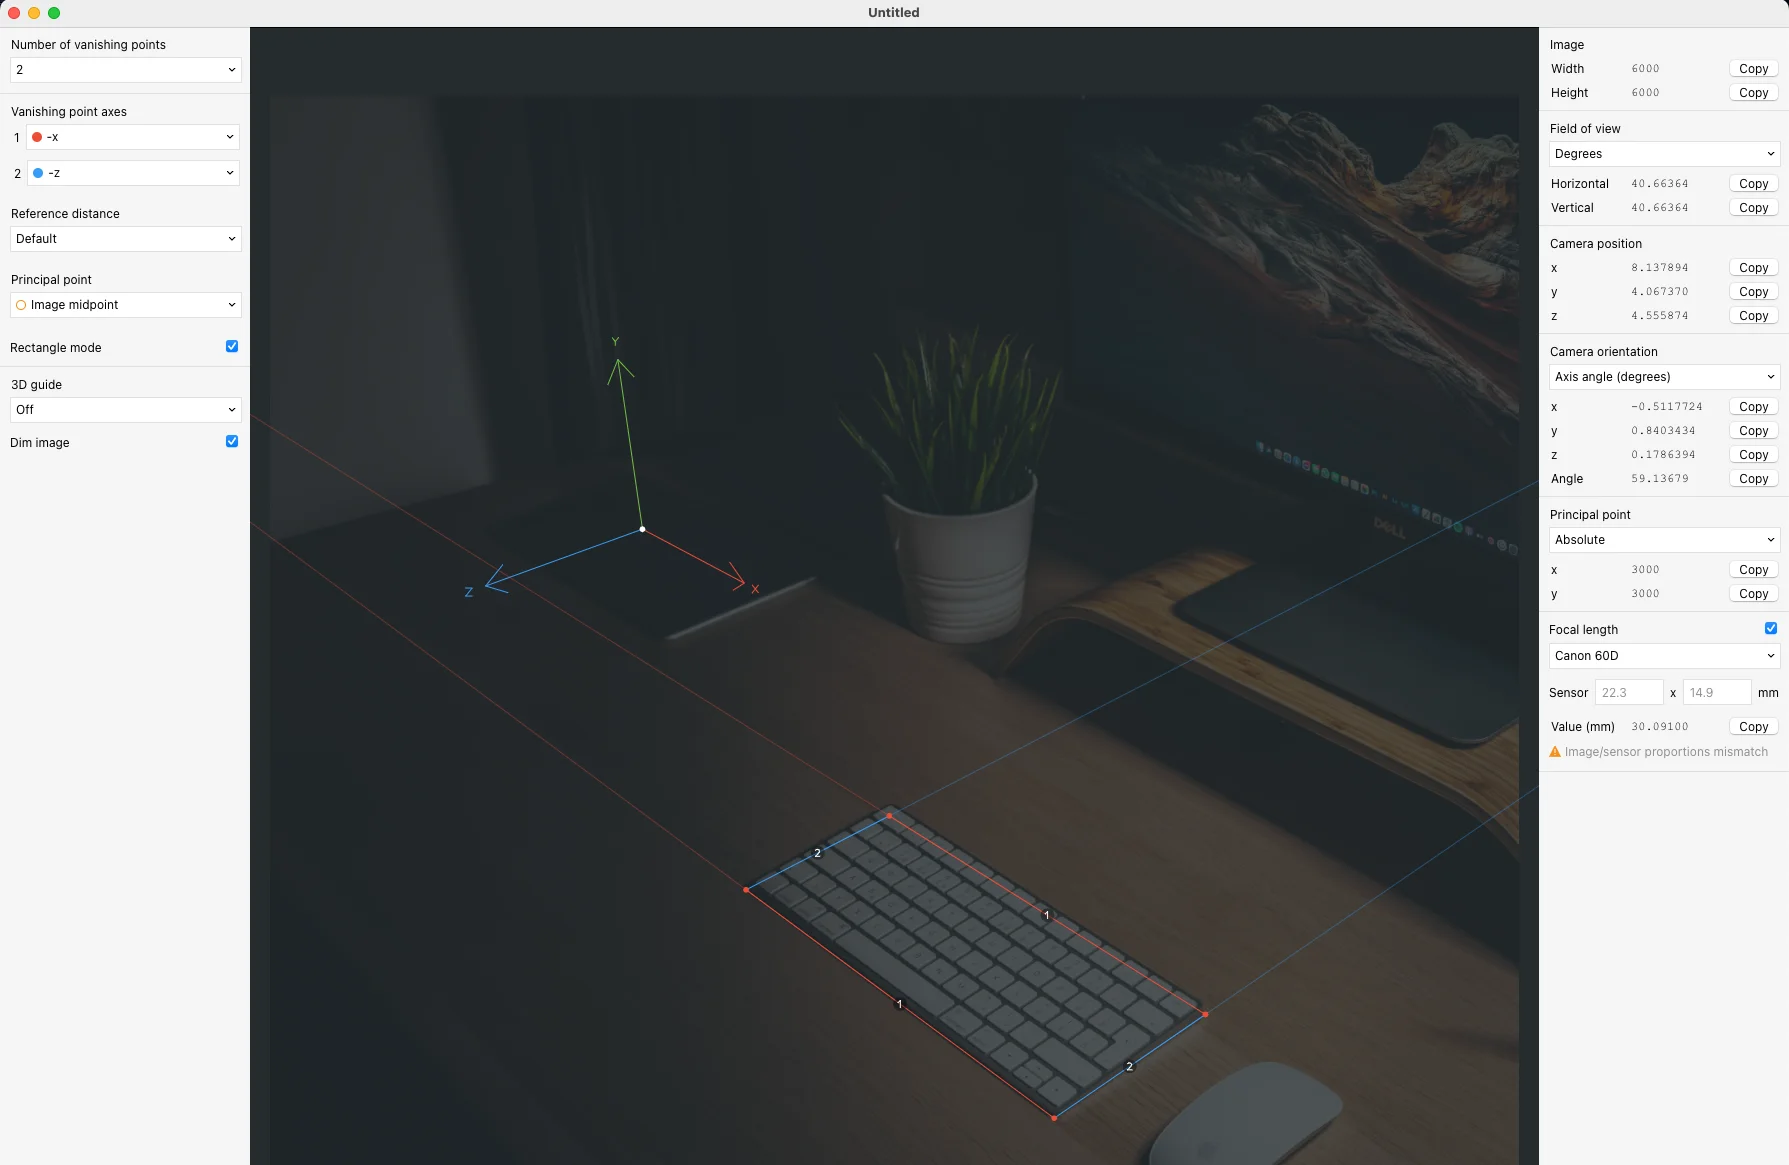
Setting the Camera
I started by getting this desk image by Jan Vlacuha, I then extended the image to the left using Photoshop ai-generative tool.The tool fspy was used to prepare the camera perspective for Blender.
Animated texturs
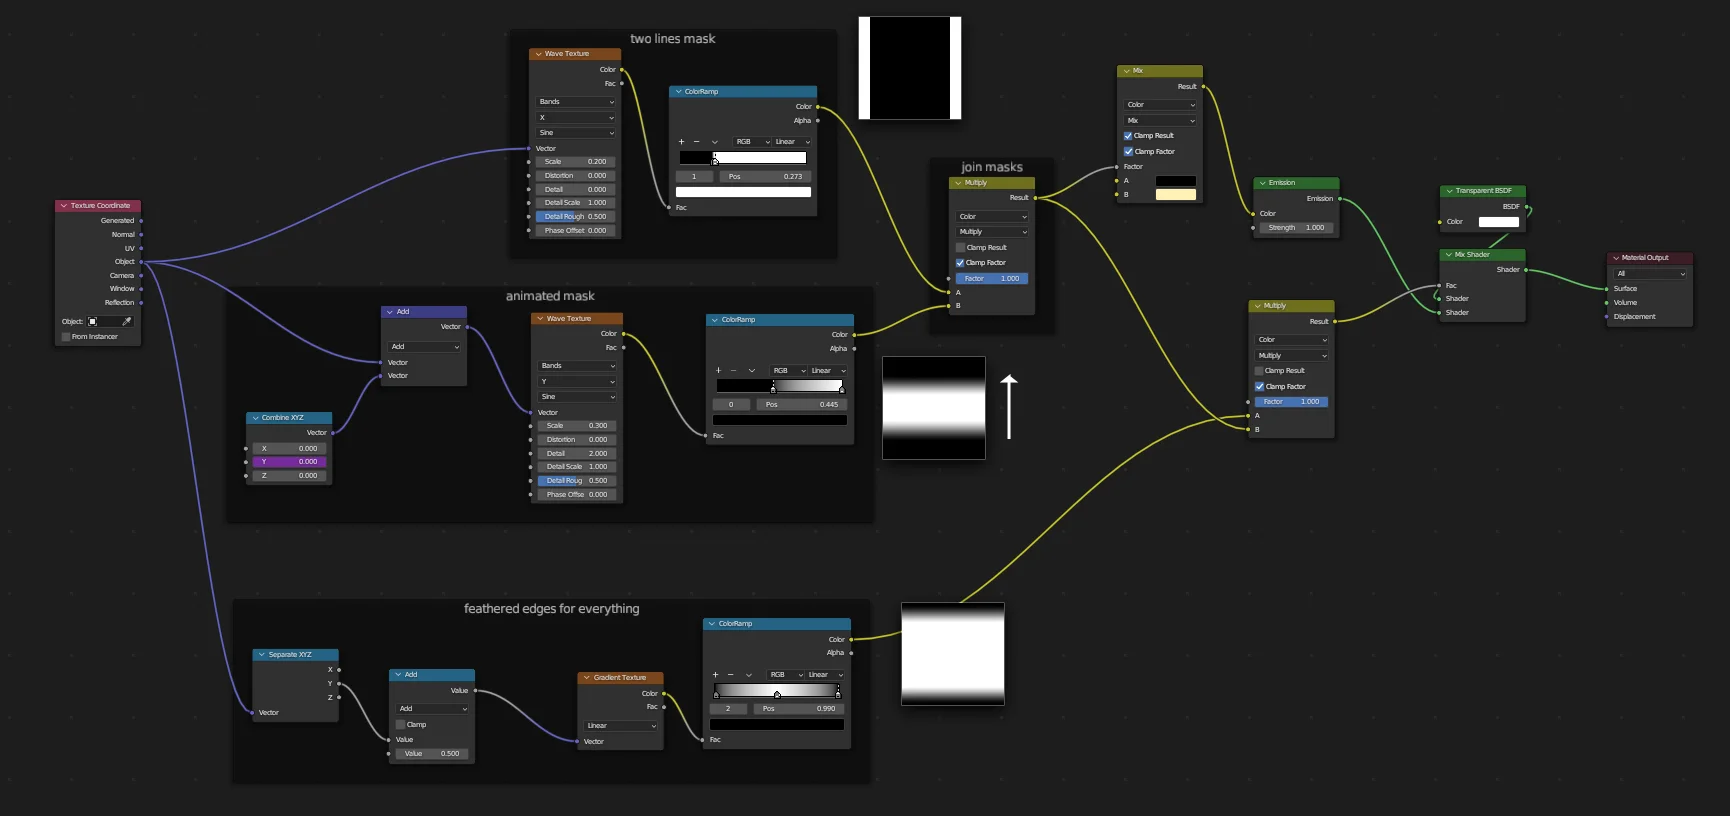
Multiple materials were made for this project, however we’ll focus on the most complex aspect of them in this project, which are the animated materials.Car wheel lines
Underneath the car, you can see two lines giving the impression that the car is moving without having to move the car. This is achieved by making 3 gradient textures, two static and one moving.
Can textures transition
In this case, we flip the view between two textures using a combination of Voronoi and Checker textures. We produce two main textures here, a black/white map to act as a mask, in addition to border around the map to use for emission during the transition.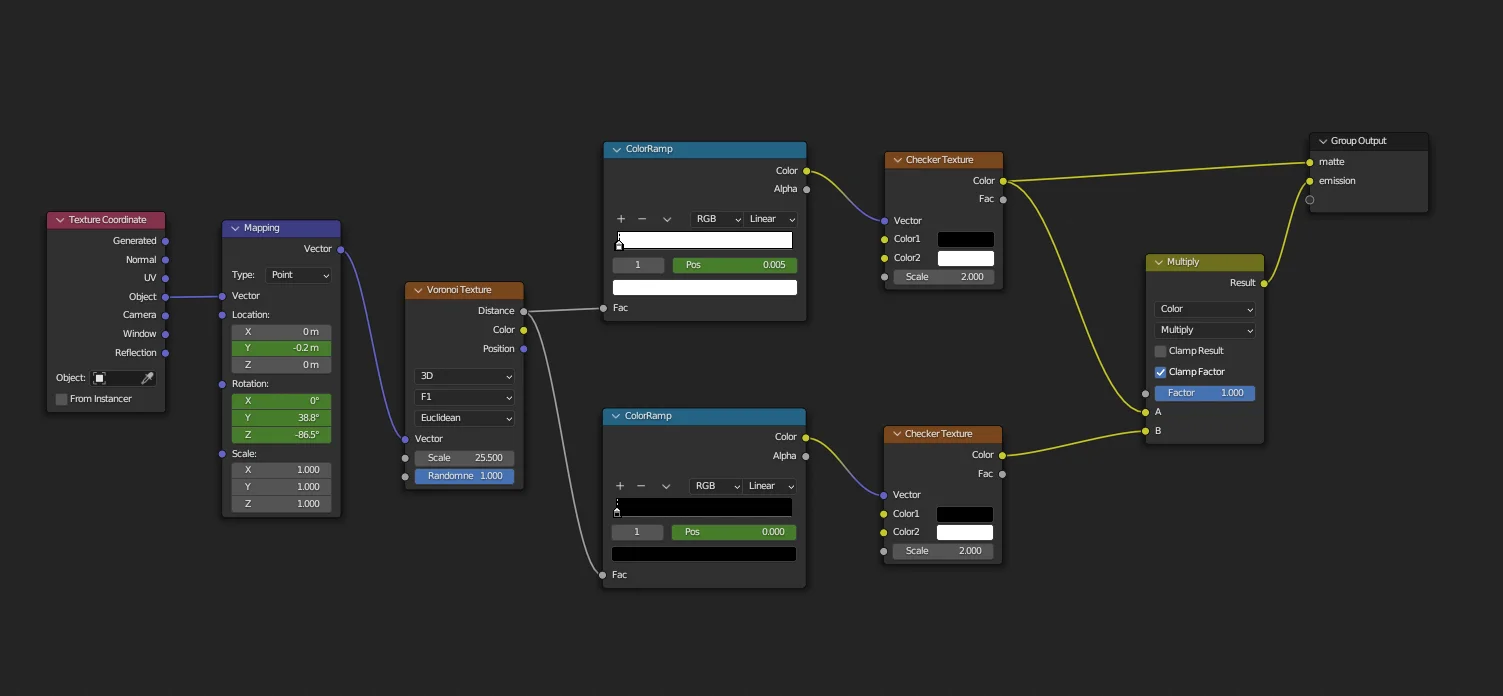
Album images
The album animation is pretty straight forward, we animate the position of the two textures and use the mix value to fade between them.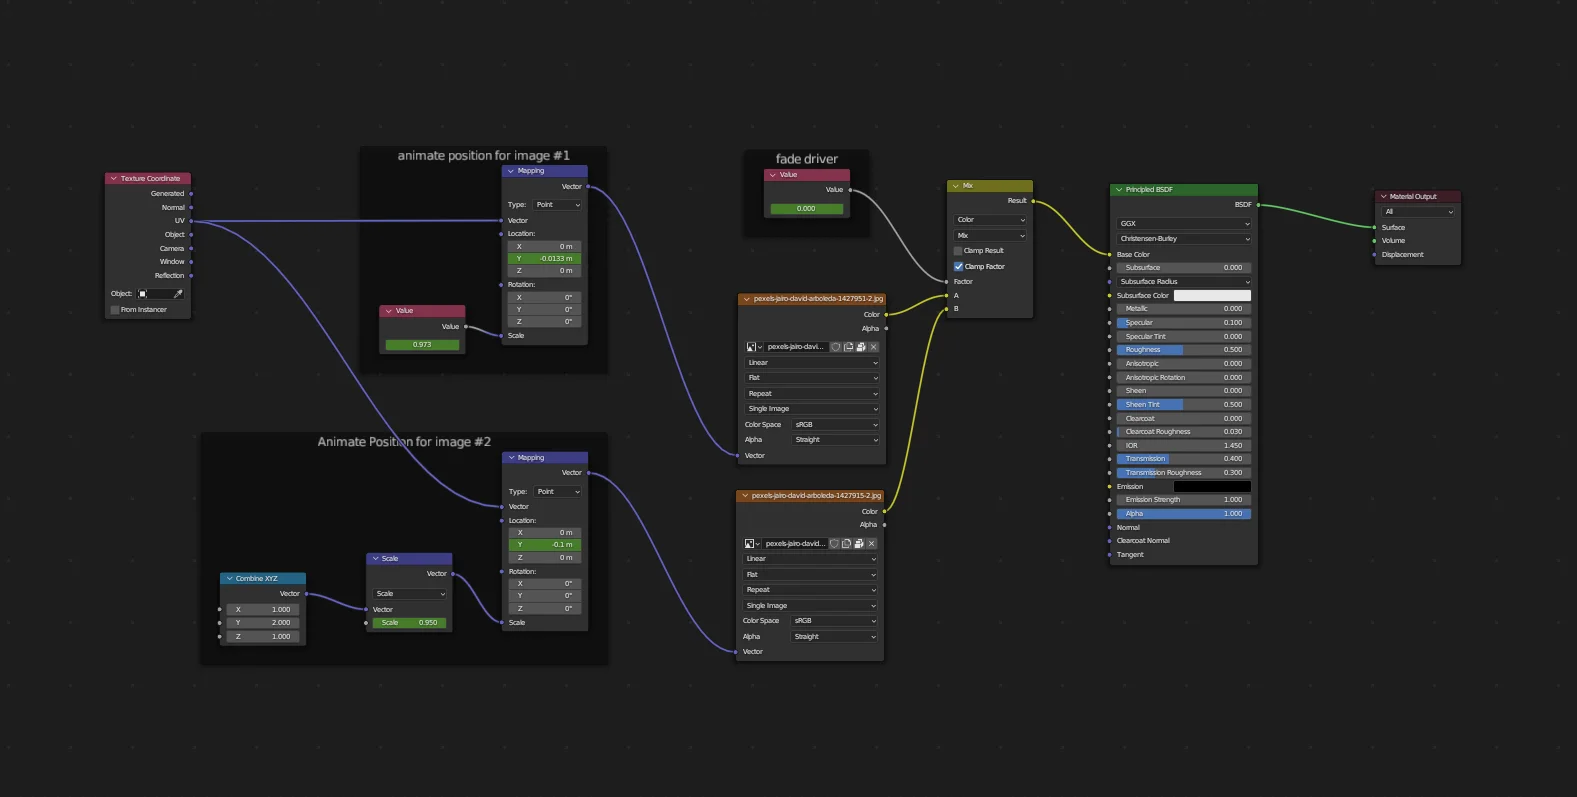
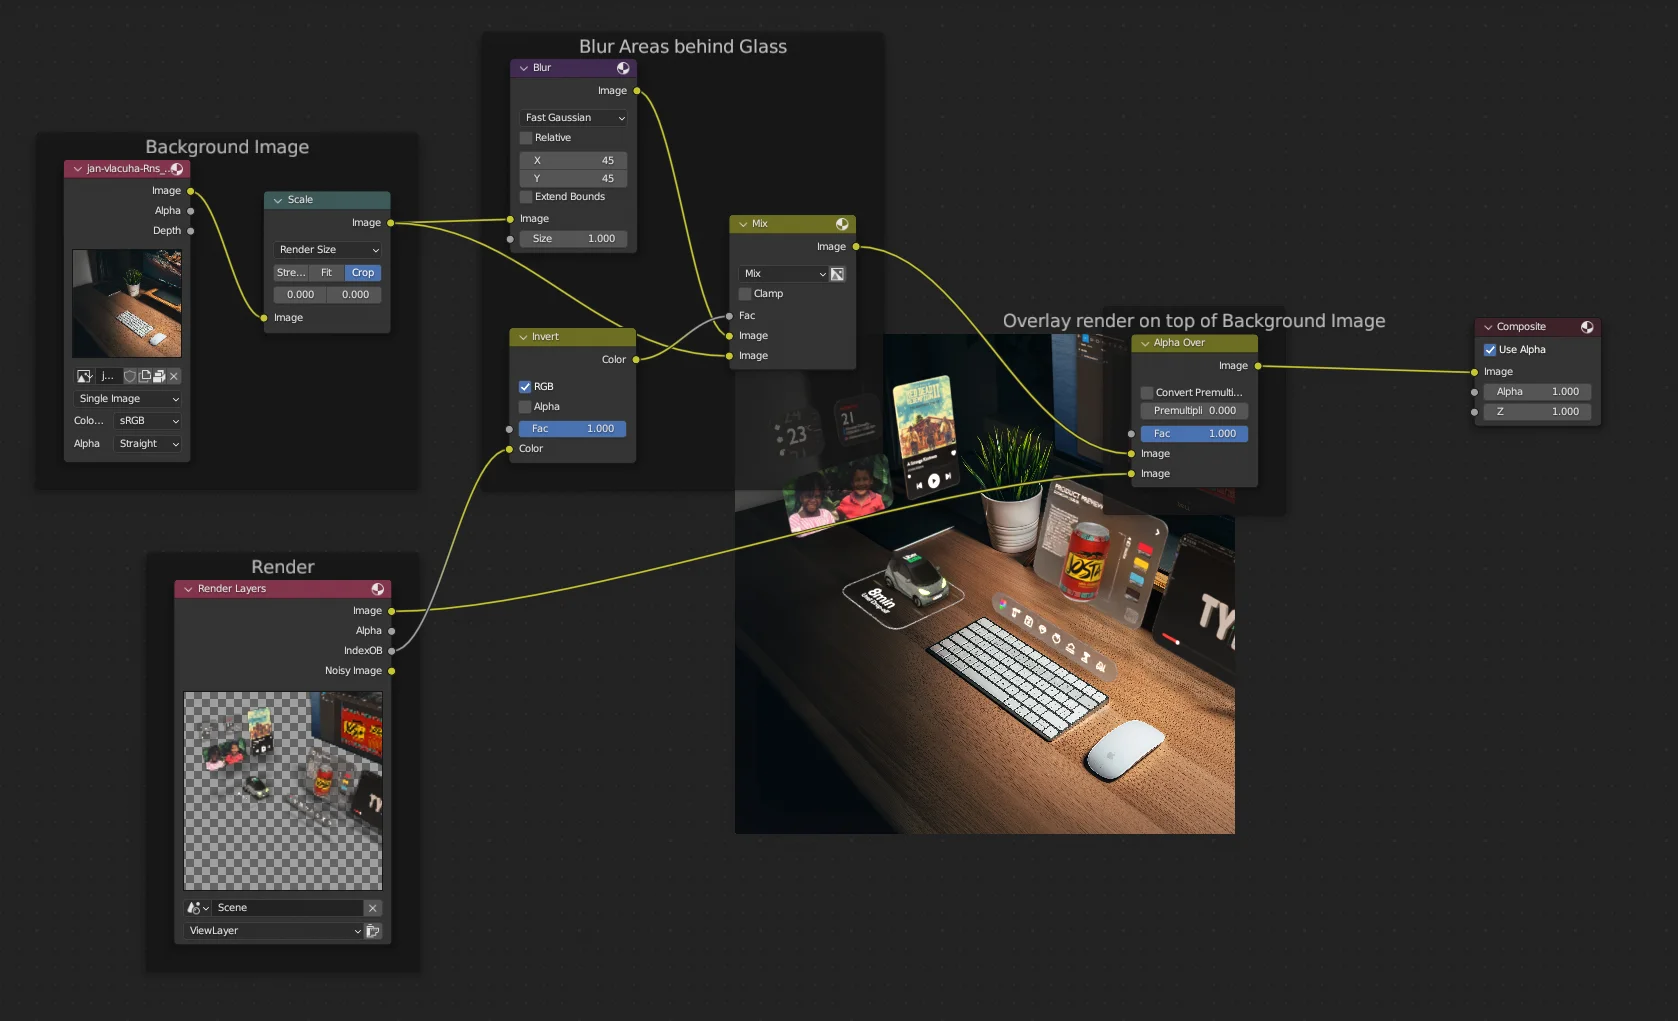
Compose render and background image
After animating and setting up the scene for final rendering, we use the compositor to blend the rendered image with the background image. Since the materials do not see the background image, which is added after rendering, we need to blur the areas behind the glass. To do this, we create a render pass for the glass materials and blur them using the Blur node in the compositor.
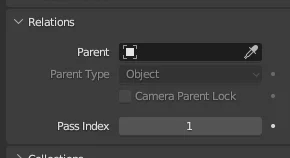
A render pass is used to mask the areas where blur is applied. From Object . Relations The pass index for each glass object was set to 1.
Credits
Soda Can model and texture by Josta
Car model by thcyrax
Desk image by Jan Vlacuha
Album images by Jairo David Arboleda